
GRC jali installation: a step-by-step method statement
A well-made jali can still fail if it’s fixed badly. This is the sequence we follow on site, written so a site engineer or contractor can check each stage.
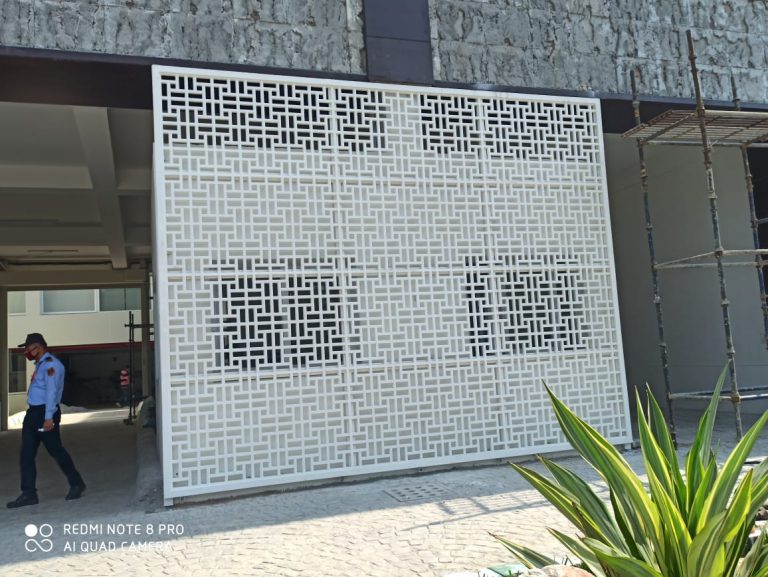
GRC jali is installed by fixing each panel mechanically to the RCC structure, never with mortar alone. The sequence is: survey the openings, set out lines and levels, fix stainless-steel anchors and brackets (or a steel sub-frame), lift panels in order from the bottom, align and shim them, tighten the fixings while leaving room for movement, then fill joints and touch up the finish.

Before panels arrive
- Approved drawings: elevation, panel layout with numbers, fixing details and bracket positions, signed off by the architect or client.
- Structure ready: slabs, beams or columns that take the fixings are cast and cured. Plaster on the fixing faces is either not yet done or the plaster thickness is known.
- Access: scaffolding, a mobile platform or a hoist, safe for the height and panel weight.
- Storage area: a flat, firm area near the work face where panels can stand upright on timber battens.
- Materials: anchors, brackets, bolts, shims and joint filler checked against the specification.
Step 1: Survey the openings
Measure every opening as built. RCC frames are rarely perfectly true, so record width, height, diagonals and plumb. Compare with the drawings and flag differences before panels are cut or before fixing begins. Small deviations are taken up at the joints and brackets. Large ones need the panel layout adjusted.
Step 2: Set out lines and levels
- Mark a level datum on each floor.
- Snap vertical lines for panel edges so joints run straight over the full height.
- Mark every anchor position from the fixing drawing.
Step 3: Fix anchors and brackets
Most jali is fixed directly to slab edges, beams or columns with stainless-steel angle brackets and anchors. Large or cantilevered screens may use a galvanised steel sub-frame.
- Drill to the anchor manufacturer’s diameter and depth, and clean the hole.
- Keep minimum edge distances from slab and beam edges, so the anchor doesn’t spall the concrete.
- Use stainless steel or properly galvanised steel. Plain mild steel will rust and stain.
- Brackets should have slotted holes so the panel can be adjusted.
Step 4: Lift and place panels
- Install from the bottom up, following the panel numbers.
- Carry and lift panels on edge, not flat. GRC is strong in its plane but can crack if a large panel is lifted flat and flexes.
- Use soft slings or the cast-in lifting points. Never lift from a thin rib.
- Rest each panel on its support brackets before connecting the restraint fixings.
Step 5: Align, shim and fix
- Check line, level and plumb, and that the pattern runs continuously across joints.
- Use stainless or plastic shims for adjustment, not timber wedges left in place.
- Tighten bolts to the specified torque.
- Allow movement. GRC expands and contracts with heat and moisture. Each panel should have fixings that let it move slightly. Don’t pack joints solid with mortar or bolt every edge rigidly.
Step 6: Fill joints
Joints between jali panels are typically filled with a flexible filler or a polymer-modified mortar to match the finish, depending on the specification. On exposed façades a sealant joint with a backer rod may be specified. Keep the joint width consistent so the pattern reads as continuous.
Step 7: Finish and touch up
- Patch minor chips from handling with a matching GRC repair mortar.
- Clean off dust, pencil marks and drill dust.
- Apply the final sealer or paint if specified, after joints have cured.
Step 8: Inspection and handover
Walk the whole screen with the client or site engineer and record:
- Panels in line, level and plumb, with even joints.
- All fixings in place and tightened; no missing bolts.
- No cracks or broken ribs.
- Consistent colour and finish.
- Site cleaned and spare material removed.
Mistakes we see on site
- Fixing jali with mortar or tile adhesive only. It looks fine for a while, then panels loosen or fall.
- Using mild steel anchors that rust and stain the finish.
- Drilling anchors too close to the slab edge.
- Lifting large panels flat, which causes hairline cracks.
- Restraining every edge rigidly, leaving no room for movement.
- Installing before the opening sizes were checked, then forcing panels to fit.
Safety on site
- Work at height only from secure scaffolding or platforms, with harnesses where required.
- Barricade the area below during lifting.
- Wear eye protection when drilling and cutting.
- Check that the lifting equipment is rated for the panel weight. Our guide to GRC properties gives density for weight calculations.
Frequently asked questions
Can GRC jali be fixed with cement mortar?
Not as the only fixing. Mortar can fill joints, but every panel must be held by mechanical fixings such as anchors and brackets.
Should jali be installed before or after plaster?
Fixing points are best prepared before plaster, so anchors go into sound concrete. The jali itself usually goes up after the surrounding wall is plastered and painted to avoid staining it.
Which anchors are used for GRC jali?
Stainless-steel expansion or chemical anchors into RCC are common, chosen for the load and the edge distance available. The fixing drawing should specify the type.
Do you install jali outside Delhi NCR?
Yes. Our installation team travels to site, or we brief your local contractor on the fixing method. The minimum order is 1,000 sq ft in Delhi NCR and 1,500 sq ft elsewhere.

About the author
Written by the people who draw, mould, cast and install GRC at Asian GRC, a Gurugram manufacturer working in glass fibre reinforced concrete since 2012. Our work includes GRC jali for Taj Palace, New Delhi (G20 Summit 2023) and for power projects of NTPC and NPCIL. Figures in our articles come from our own production and site work, or from the standards and sources we cite.


Need a fixing plan for your jali?
Send the elevation and structure drawings. We'll mark fixing points and module sizes before you plaster.